1.0 Introduction
The purpose of this document is to show how to install multiple instances of the Cognite DB Extractor as a Windows service, where each instance is using a different config.yml file.
2.0 Steps
2.1 Create a System DSN Entry for the MS SQL Server Database Used as the Source for the Extractors.
-
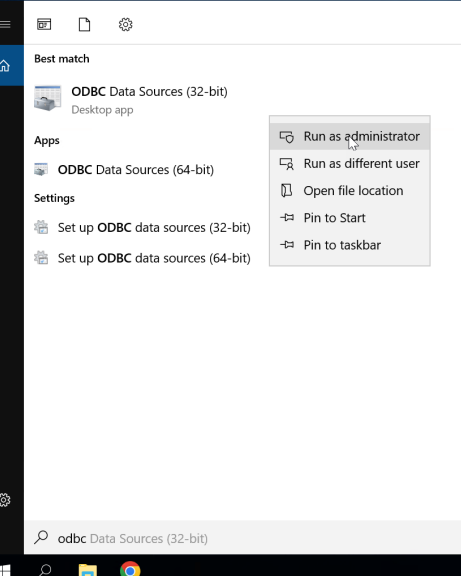
Run the “ODBC Data Sources (32-bit)” program as an administrator.
-
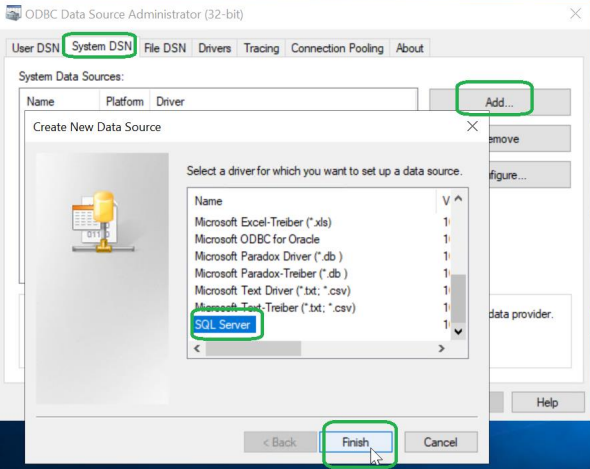
Click on the “System DSN” tab and click on the “Add” button to create a new SQL Server DSN.
-
Use the wizard to name and configure the new System DSN entry.

-
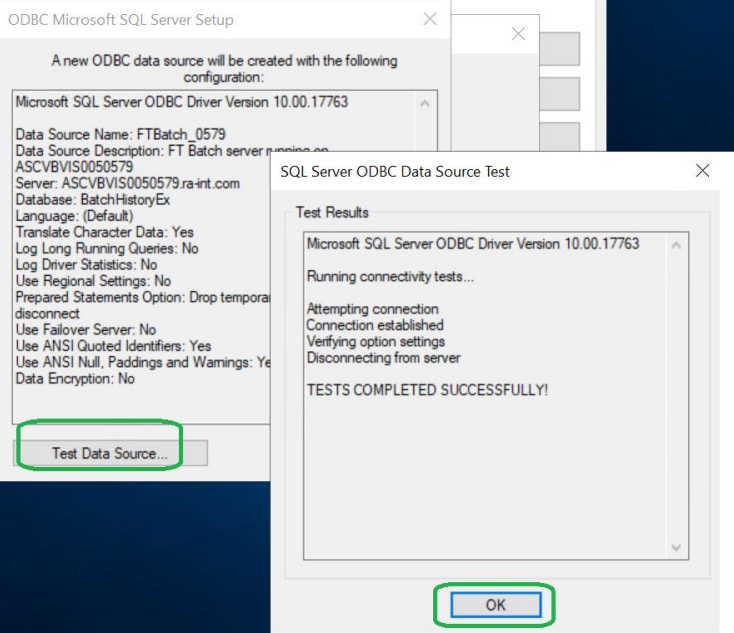
When finished with the configuration, click on the “Test Data Source” button to confirm the entry is working; the “Test Results” popup window shown to the right should open to confirm the test was completed successfully.
2.2 Installing the First Instance of the Windows Service
-
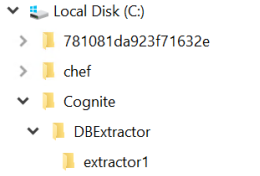
Create the C:\Cognite\DBExtractor\extractor1 folder.
-
Download the “dbextractor-winservice-v3.2.0.zip” file and extract the contents into the C:\Cognite\DBExtractor\extractor1 folder.
-
Copy the first config.yml file into the C:\Cognite\DBExtractor1 folder.
-
Open an elevated command prompt and run the command “dbextractor-winservice-v3.2.0-win32.exe install”.
-
Close the command prompt window.
-
Start the Registry Editor application.
-
Navigate to the “HKEY_LOCAL_MACHINE\SYSTEM\CurrentControlSet\Services” key and expanded the tree to find the “DBExtractor” entry.
-
Right-clicked on the “DBExtractor” entry and selected the “Rename” menu option.

-
Change the name to “DBExtractor1”.
-
Reboot the server.
-
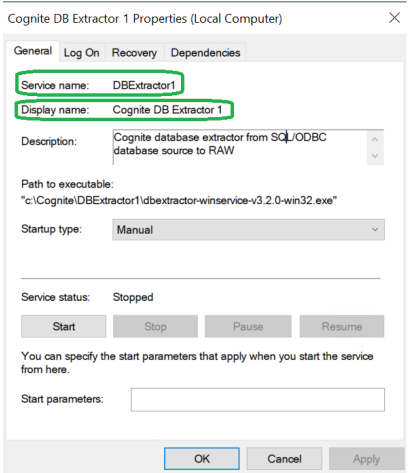
Open an elevated command prompt and ran the command “sc config “DBExtractor1” displayname= “Cognite DB Extractor 1”.
-
Reboot the server.
-
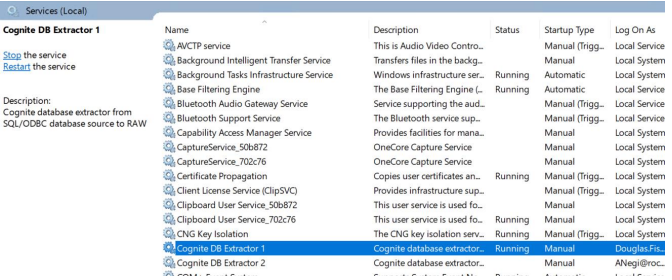
Start the “Services” program to confirm the above changes were applied to the Cognite DB Extractor service.
-
Complete the configuration of the service (e.g. Log On, Recovery, Startup type)
2.3 Installing the Second Instance of the Windows Service.
Follow the same 14 steps used to create the first service instance but with these changes:
-
Used the folder C:\Cognite\DBExtractor\extractor2
-
Use the same System DSN but in a different config.yml file directing data to a different FTDM project.
-
Change the name of the service to “DBExtractor2”.
-
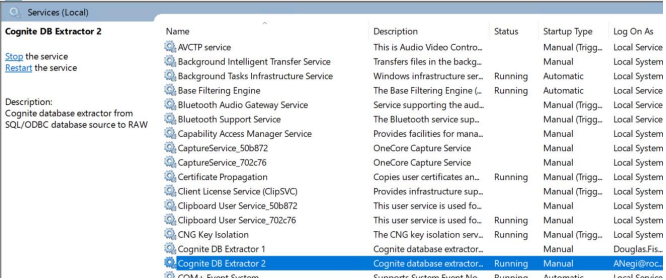
Change the display name of the service to “Cognite DB Extractor 2”.
-
Use a different domain account in this service’s “Log On” configuration because each service instance of a given extractor must use a different account.
2.4 Start the Services
-
Start the service for DBExtractor1 to check whether the DBExtractor1 service is working properly.
-
Stop the service for DBExtractor1.
-
Start the service for DBExtractor2 to check whether the DBExtractor2 service is working properly.
-
Stop the service for DBExtractor2.
-
Start the service for DBExtractor1 again.
-
Start the service for DBExtractor2 again while the service for DBExtractor1 is running.
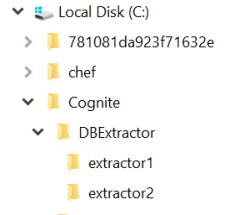
Please make sure to use the below mentioned folder structure when running multiple Instances of DB extractors.

C:\Cognite\DBEXTRACTOR
├───extractor1
│   ├───config\config.yml
│   └───logs
|   └───.exe
├───extractor2
│   ├───config\config.yml
│   └───logs
|   └───.exe