Docker is one of the most common ways to deploy an extractor because of its ease of use. Our off-the-shelf extractors have a Docker image you can download and run. But when it comes to custom extractors, you have to build the Docker image yourself (if you intend to run it with Docker, of course). In this article, we’ll see how to do that. We’ll use the example of the REST extractor, from a previous article (https://hub.cognite.com/developer-and-user-community-134/rest-extractor-1232). It is a custom extractor, made with our extractor-utils package, hence it does not have a pre-built Docker image.
The content of this article will be specific to the REST extractors made with the extractor-utils package, but is still applicable to other kinds of extractors. You simply have to make sure to adapt environment variables, arguments etc. to what your extractor needs.
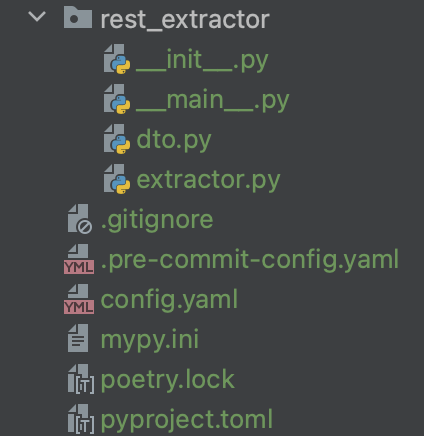
First, make sure that you have Docker installed, up and running. Open the python project with the extractor in your code editor. The folder structure should look like this:
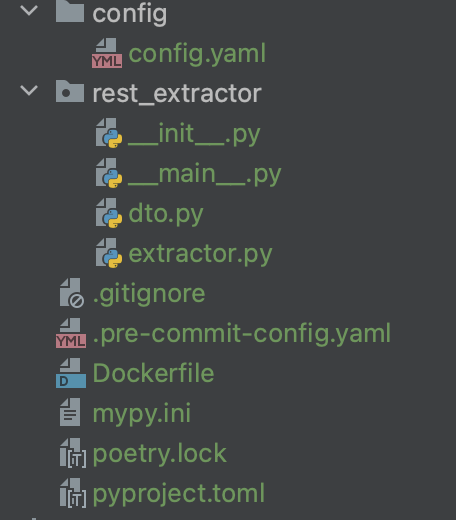
Now, move the config.yaml file inside a config folder and add a file named “Dockerfile” at the root of your directory. That is the file that defines your docker image. The folder should now look like this:
Now edit your Dockerfile so it looks like this:
Dockerfile:
## 1. Selecting the base image with the appropriate Python version

FROM python:3.10-slim
RUN apt-get update
RUN apt-get install -y --no-install-recommends \
build-essential gcc


## 2. Adding a group and a python user to that group

RUN groupadd -g 999 python && \
    useradd -r -u 999 -g python python


## 3. Creating a working directory owned by the python user

RUN mkdir /usr/src/app && chown python:python /usr/src/app
WORKDIR /usr/src/app

## 4. Copying requirements

COPY --chown=python:python pyproject.toml .


## 5. Poetry install

RUN pip install --upgrade pip && pip install poetry
RUN poetry config virtualenvs.in-project true
RUN poetry install


## 6. Copying the app code

COPY --chown=python:python rest_extractor ./rest_extractor


## 7. Actually selecting our python user to run the extractor

USER 999

ENTRYPOINT E"poetry", "run", "rest_extractor"]
The first code block defines the base image we build our image on top of. Here we want a Python3.10 image but you could want some other image: another python version or another distribution. Selecting the “:latest” tag is not considered as a good practice since it could introduce breaking changes at a version change. For security reason, it is also good to know the specific version you are using. Also, we want the “-slim” version when possible: it is a smaller image with smaller size and attack surface (they usually have less vulnerabilities). A good practice is to check the different tags available on Docker Hub and choose the one that suits best your purpose (https://hub.docker.com/_/python). The base image is actually pulled from Docker Hub (if not already present on your machine).
Then, in 2., we create a user to actually run our code: it is a good practice, security-wise, to use a least-privileged user (and never. We then change the ownership of the files to that python user, so it can make use of them.
In the third code block, we create the directory we will use as a working directory and set the python user as owner of it.
In the fourth and fifth code blocks, we copy the requirements from the host to the image, and install the dependencies.
Then, in 6., we copy the actual extractor code in the working directory (with the python user as owner).
Finally, in 7., we actually change the user to the python user: it will be used from now on to run the next steps. The ENTRYPOINT line specifies what will be executed in the container when we call “docker run rest-extractor”. Since the extractor expects a config file, we’ll need to add that config file’s path at the end of the “docker run” command. “rest_extractor” is the package name in our case.
Now run the following command in your root directory to build your docker image:
docker build . -t rest-extractor
The docker image of your extractor is now built and has the “rest-extractor” name (you can obviously change that name if you want to). Now, we need to run it as a container to have our extractor running.
Since we usually use a few environment variables when working with the CogniteClient object, to pass the client ID, client secret etc. we’ll use create a .env file (in the root directory). Make sure the environment variable names match the ones that are listed in your config file. The .env file should look like this:
.env :
COGNITE_BASE_URL=...

COGNITE_PROJECT=...

COGNITE_TOKEN_URL=...

COGNITE_CLIENT_ID=...

COGNITE_CLIENT_SECRET=...

FROST_CLIENT_ID=...
Replace the “...” by the actual values of your environment variables. Make sure they are stored in a secure manner and do not share your client secret.
Now you can run the following command, in your root directory, to run the extractor as a Docker container. Here we are mounting the “config” folder to the container instead of having it in the image itself. Doing so, the image is independent of the configuration: you do not have to rebuild an image every time you change the configuration.
docker run --env-file=.env -v $PWD/config:/config rest-extractor config/config.yaml Your extractor is now running ! you should be able to see its logs in the terminal.
It’s recommended to have a look at the Docker documentation to know the arguments you could use with the “docker run” command.
We could also use Docker Compose, or even Kubernetes or any other container orchestrator to run the extractor as a Docker image. But here, Docker is a good fit for a single container to run. Also, once you have an image, you could share it on any image repository (public or private) to facilitate sharing across your company for example. Before doing that, you have to make sure you are not sharing any sensitive information, like a secret or a password, in your image.
There are other ways to build images, like buildpacks, that you may want to read about (https://buildpacks.io/).
We highly recommend to have a further look at the security topic when using docker. The following article is a good start: https://snyk.io/blog/best-practices-containerizing-python-docker/.
If you have any question about the content of this article, feel free to ask ! any feedback is welcome.