Check the
documentation
Check the
documentation Ask the
Community
Ask the
Community Take a look
at
Academy
Take a look
at
Academy Cognite
Status
Page
Cognite
Status
Page Contact
Cognite Support
Contact
Cognite Support

This guide will show you how to use the Toolkit with GitHub Actions to manage Cognite Data Fusion configuration through CI/CD and configuration-as-code.
The purpose of this setup is to introduce traceability and quality assurance to the project lifecycle, and to reliably and safely make changes to the Cognite Data Fusion project. The guide will show you how to set up a GitHub repository with a GitHub Action workflow that will automatically build and deploy the project when changes are made to the main branch. The guide will also show you how to set up GitHub secrets to store sensitive information such as client secrets.

1. Prepare a GitHub repository for your project
Create and clone a GitHub repository. Make it private.
If you already have gone through the steps of setting up the Toolkit and configuring templates, you can initialise and sync your existing local working folder to GitHub like this instead of cloning:
cd [my_local_repo_folder]
git init .
git remote add origin [my_github_repo_url]
git checkout -b [my_new_branch]
Make sure you enable branch protection for the main branch and require pull requests with approval from other members of your team before merge into the main branch to avoid accidental changes to the production environments.
2. Add your configurations to the repository
After setting up the Toolkit and configuring templates, add the following to your branch
git checkout [my_new_branch]
git add .gitignore
git add cognite_modules #if used
git add custom_modules #if used
git add common_function_code #if used
git add config.dev.yaml
git add config.prod.yaml #if used
git commit -m "Added configuration artefacts"
git push --set-upstream origin [my_new_branch]
Before you continue, verify that the cdf-tk build and deploy commands work locally before you continue.
3. Create a GitHub Action
In your local working directory, create a folder called ./github/workflows/ .
Add a yaml file for the environment you want to deploy to, for example deploy_dev.yml
name: Deploy modules to dev project
on:
  push:
    branches:
      - main # run when this branch changes (following a Pull Request)
env:
  PYTHON_VERSION: '3.9'
jobs:
  build-modules:
    runs-on: ubuntu-latest
    environment: dev # refers to the Environment concept in GitHub
    env:
        CDF_CLUSTER: ${{ vars.CDF_CLUSTER }}
        CDF_PROJECT: ${{ vars.CDF_PROJECT }}
        IDP_CLIENT_ID: ${{ vars.IDP_CLIENT_ID }}
        IDP_CLIENT_SECRET: ${{ secrets.IDP_CLIENT_SECRET }}
        IDP_TOKEN_URL: ${{ vars.IDP_TOKEN_URL }}
        ## if you have additional vars or secrets you want forwarded to the script, you can add them here, for example:
        FUNCTIONS_CLIENT_ID: ${{ vars.FUNCTIONS_CLIENT_ID }}
        FUNCTIONS_CLIENT_SECRET: ${{ secrets.FUNCTIONS_CLIENT_SECRET }}

    name: Deploy
    steps:
      - uses: actions/checkout@v4
      - uses: actions/setup-python@v5
        with:
          python-version: ${{ env.PYTHON_VERSION }}
      - name: Install cdf-tk
        run: pip install cognite-toolkit
      - name: "Build the templates"
        run: cdf-tk build --build-dir=./build --env=dev
      - name: "Verify and create access rights"
        run: cdf-tk auth verify
      - name: "Deploy the templates"
        run: |
          cdf-tk deploy --env=dev ./build
Then add the workflow yaml to the repo:
git add ./github/workflows/deploy_dev.yml
git commit -m "Added Action for deploying to dev"
git push
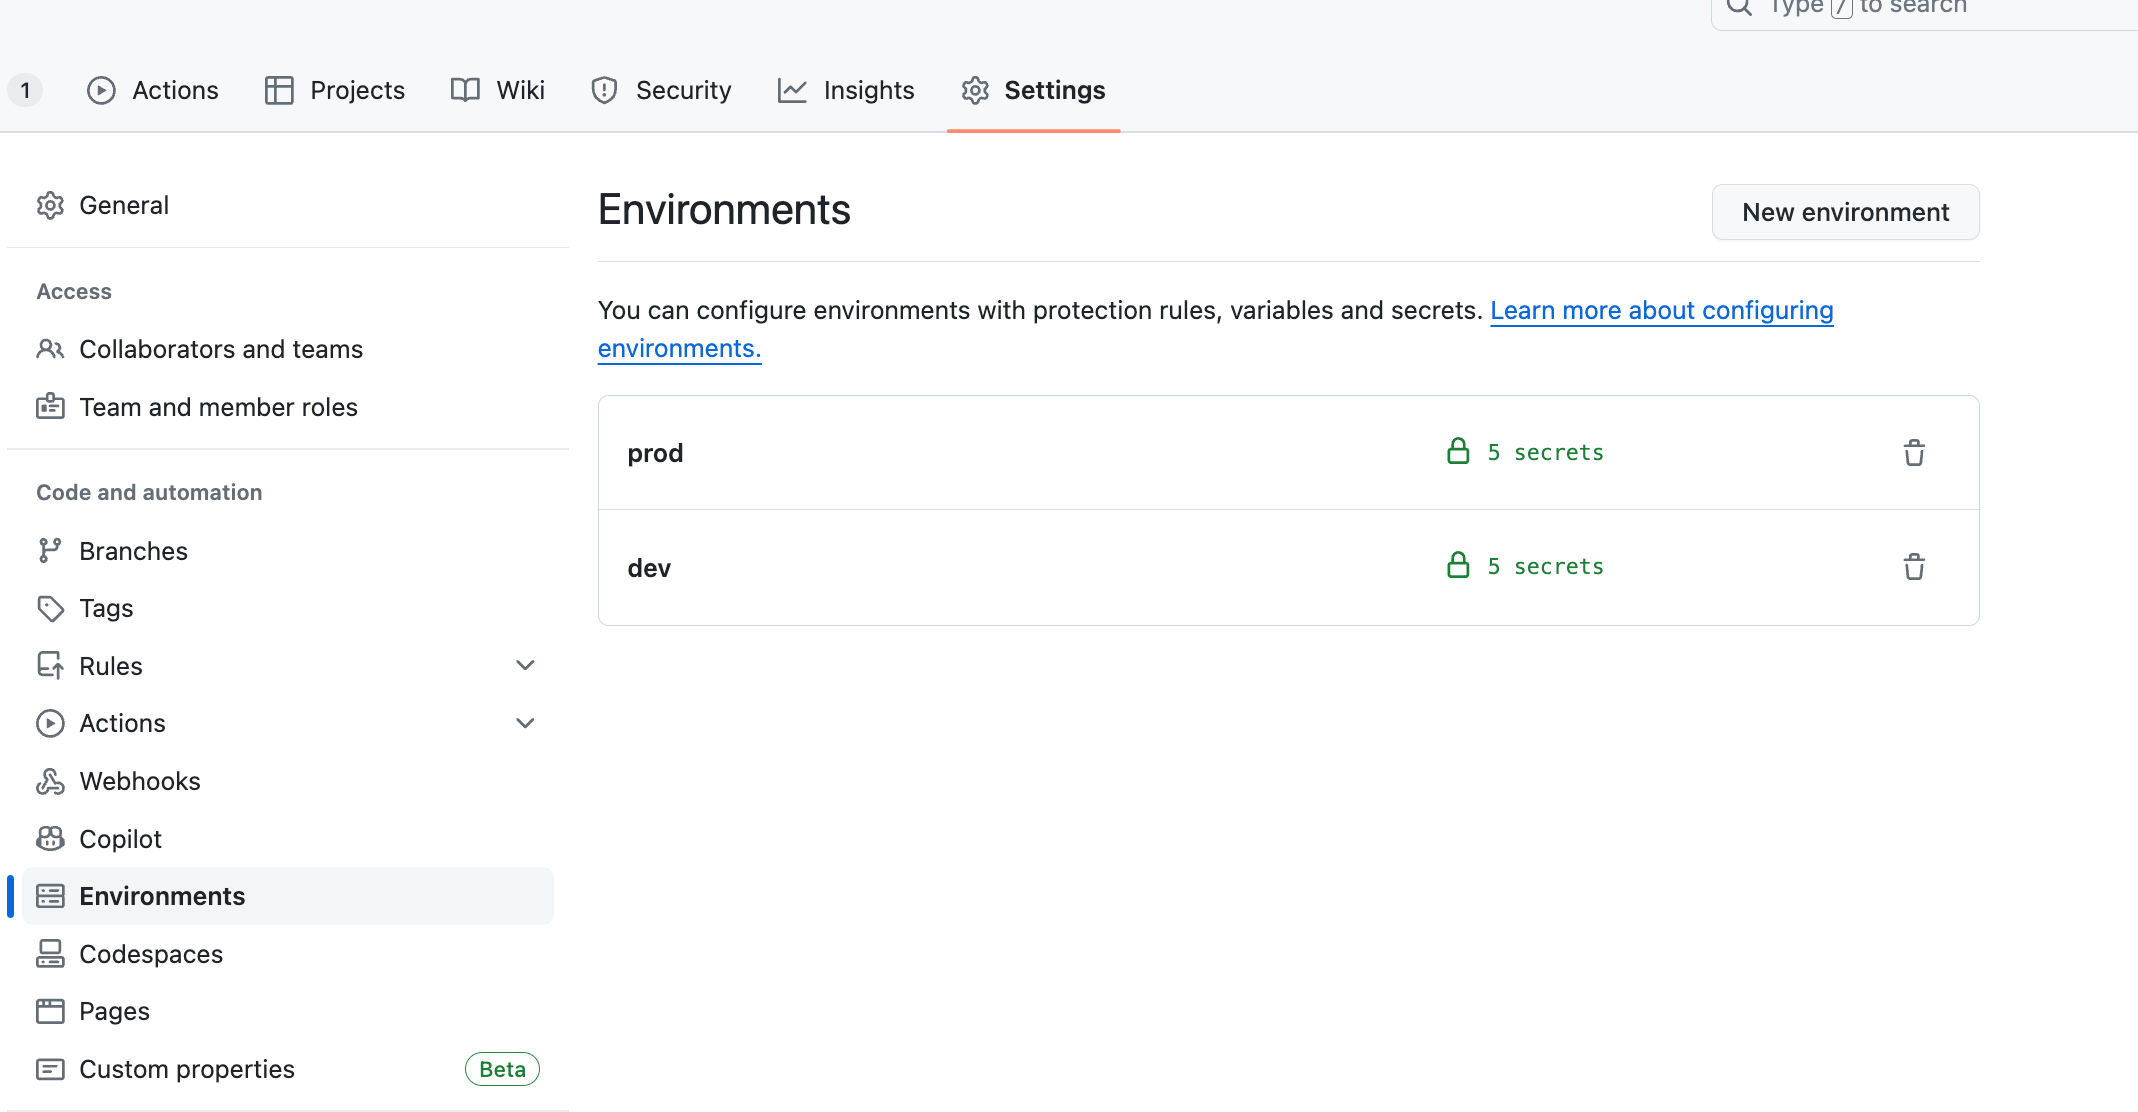
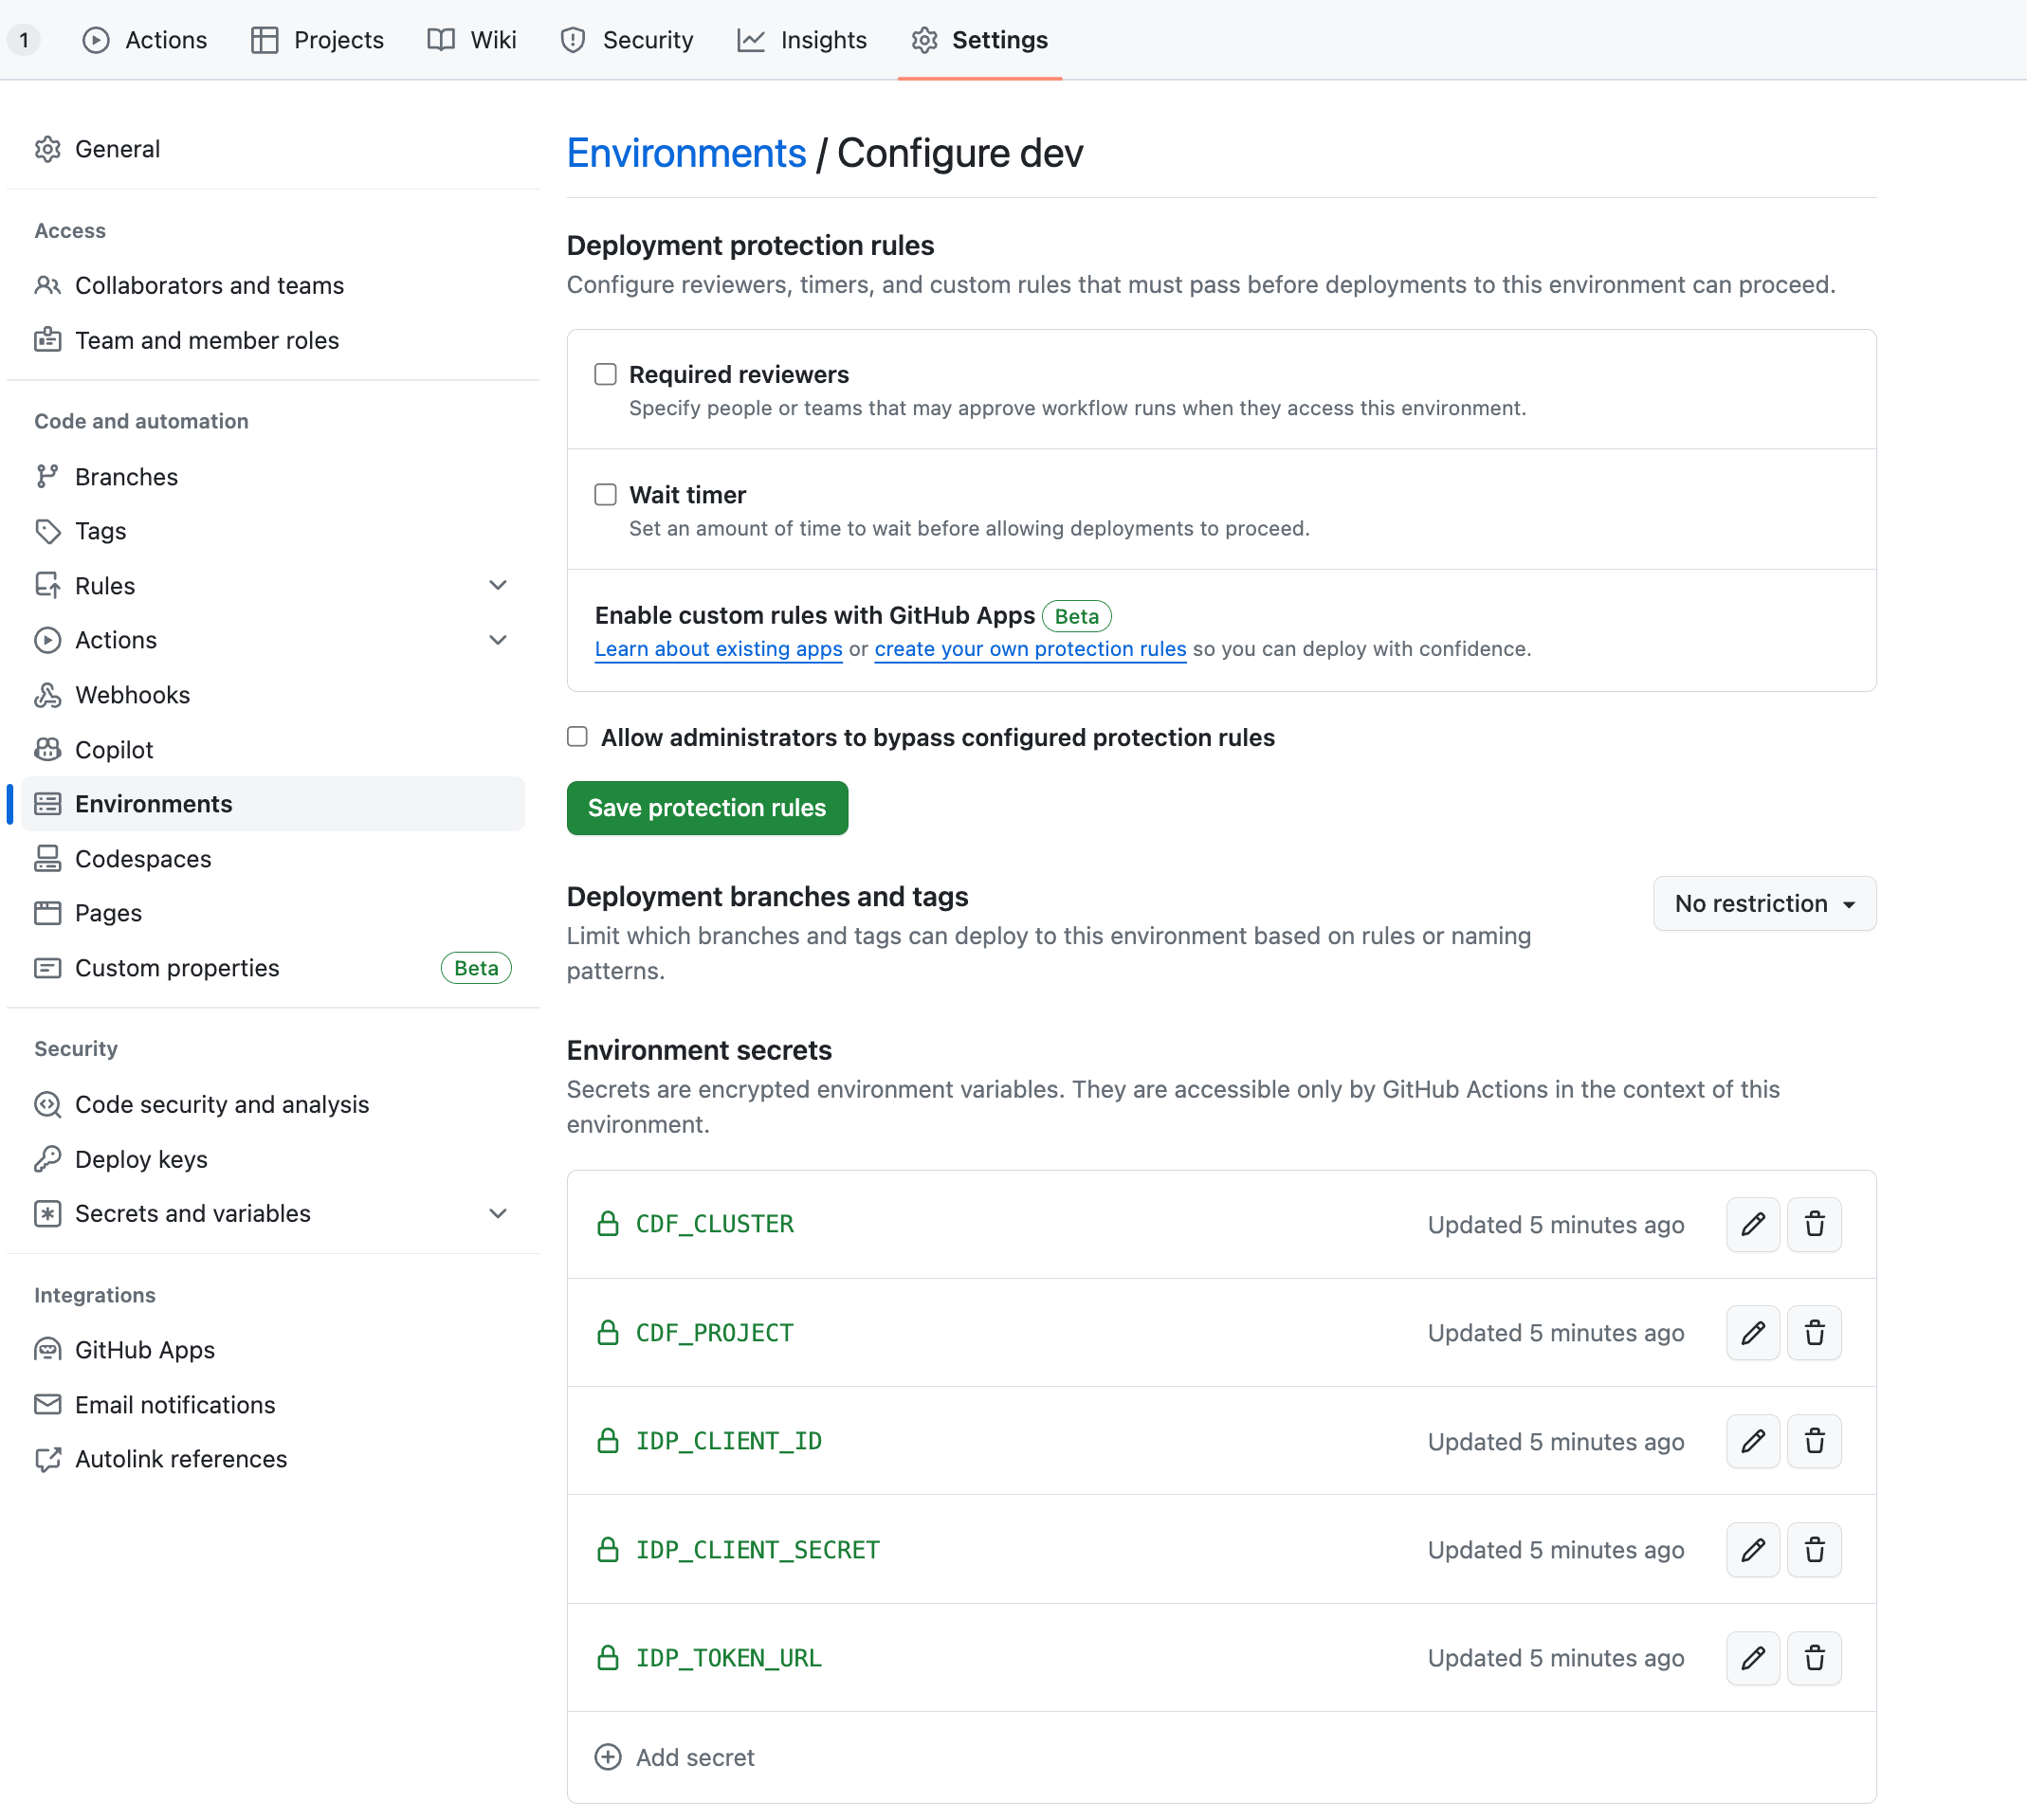
4. Set up GitHub Environments
Your GitHub repository should have an Environment for each Cognite Data Fusion project you manage through the repo. The GitHub Environments are used for storing the secrets that the Toolkit needs to authenticate.
Note that the environment variable in the yml above refers to the environment name in GitHub. For simplicity, it is recommended to give GitHub Environments the same name as you use in the toolkit.
Create secrets (text that shouldn’t be exposed) and vars and set values, same as in your local .env file:
CDF_CLUSTER=westeurope-1
CDF_PROJECT=<project>
IDP_CLIENT_ID=<client_id>
IDP_CLIENT_SECRET=<secret>
IDP_TOKEN_URL="https://login.microsoftonline.com/<entra tenant id>/oauth2/v2.0/token"
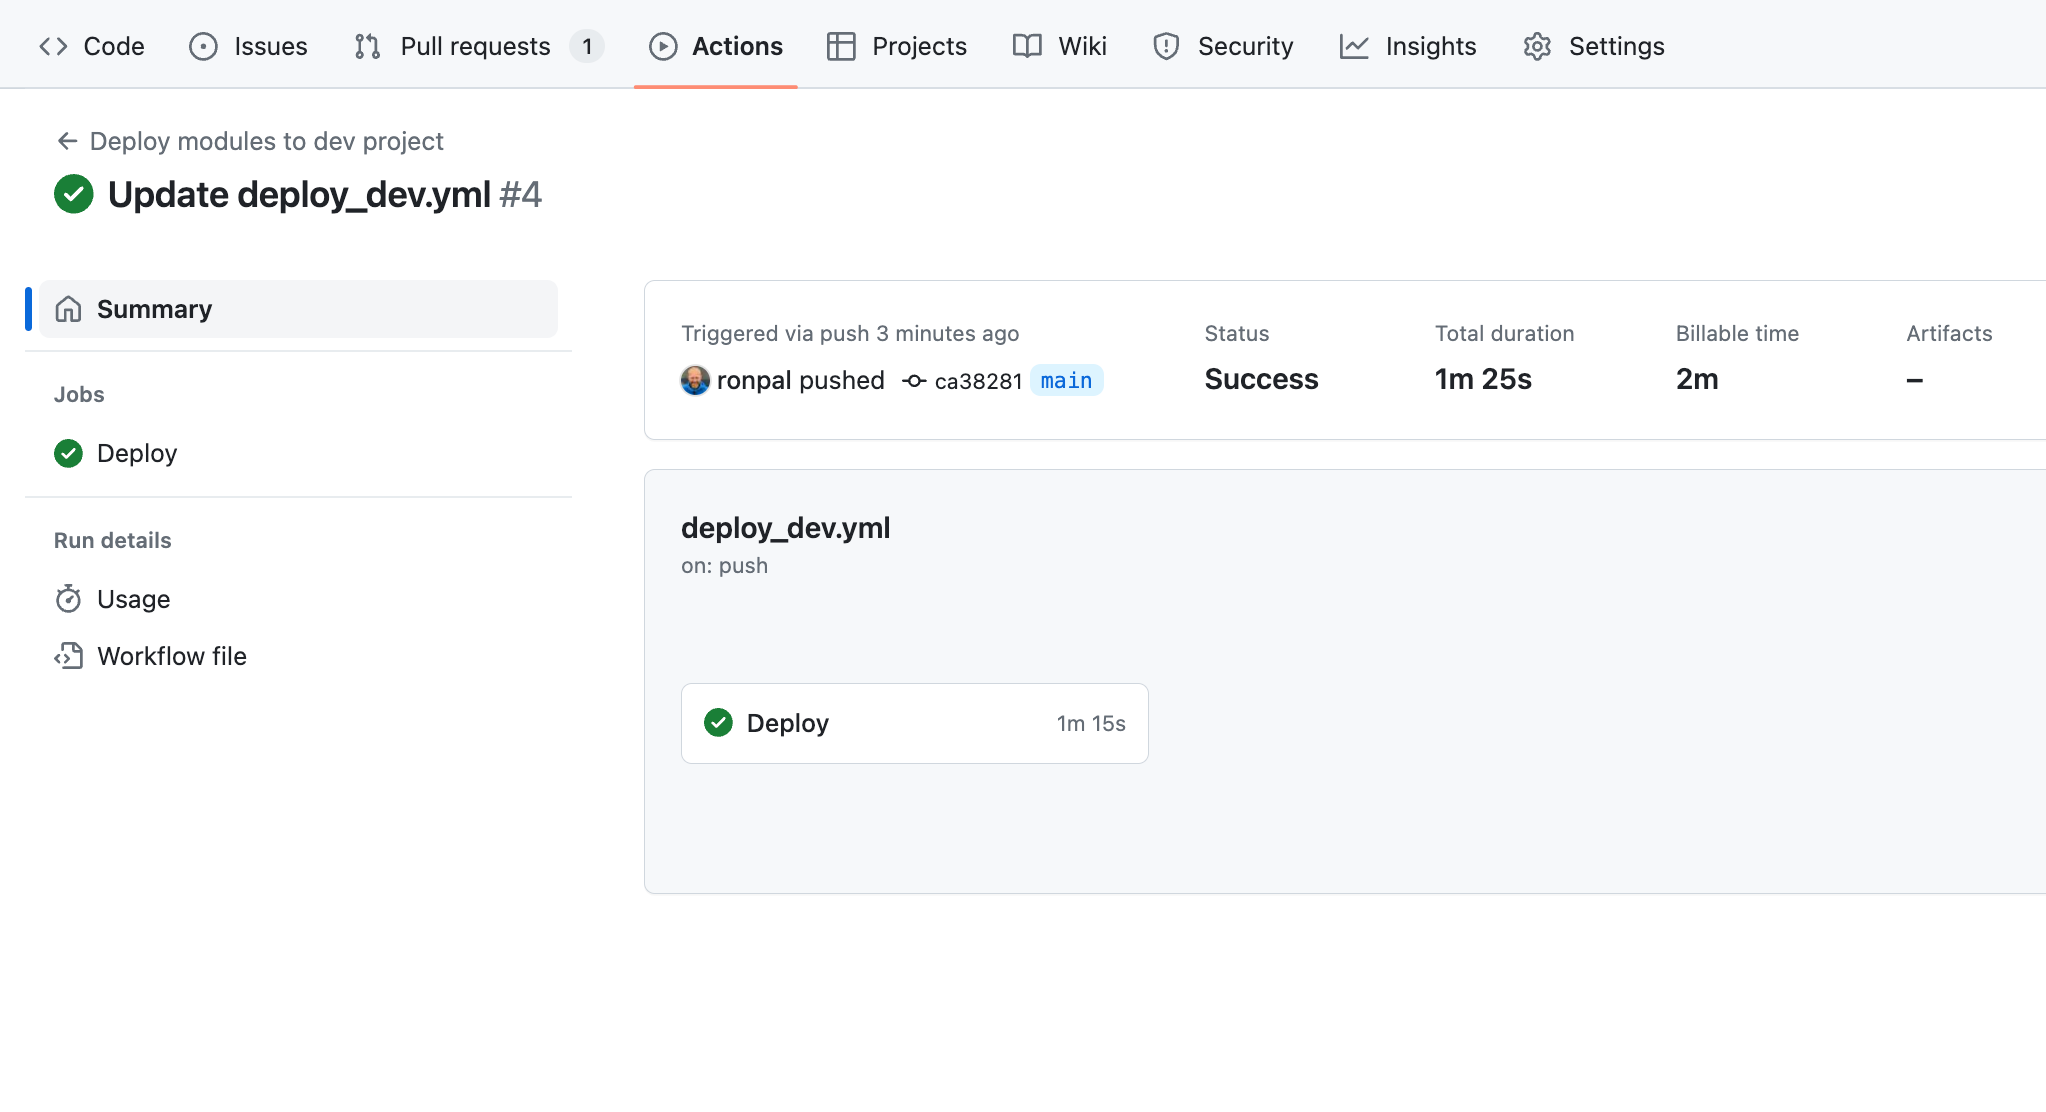
5. Test your pipeline
The pipeline should start once the main branch is updated. To test it, create a Pull request that merges from “[my_new_branch]” into main.